How Roofing Underlayment Helps Protect Your Home
Most folks only see shingles on a roof and think that’s all holding back the rain. Truth is, shingles are just the first layer. Under that sits something quiet but powerful, roofing underlayment. It’s like the unsung hero of the roof. When storms roll in or snow starts melting, that thin sheet is what keeps water from sneaking into the house.
Homeowners in Toledo and nearby towns have learned this the hard way. Shingles blew off during storms, but the roofing underlayment underneath saved the wood deck and stopped water from pouring inside. On the other hand, some homes had old felt that was ripped, and water stains showed up on ceilings overnight. That’s how quickly damage can happen.
What Is Roofing Underlayment?
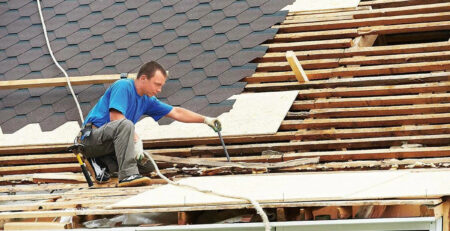
Roofing underlayment is laid right on the wooden deck before shingles go down. Think of it like the second line of defence. Shingles block most water, but wind or ice dams can push rain underneath. That’s where the underlayment stops it from touching the wood.
There are a few types out there:
-
Felt underlayment – has been used for years, but it rips easily in storms.
-
Synthetic underlayment – lighter, stronger, handles water better.
-
Ice and water shield – sticky, heavy-duty, used in valleys, edges, and spots where leaks always start.
Every home doesn’t need the same combo, but every roof needs something under shingles.

Why it matters in Toledo area homes
Our weather around Toledo, Sylvania, Perrysburg, and Maumee brings all kinds of trouble. Snow sits heavy in winter, ice dams form on edges, and spring storms dump water quick. Roofing underlayment is what buys time until repairs get done.
One family in Perrysburg had shingles torn off during a summer storm. Everyone thought the whole house would flood. But the synthetic roofing underlayment stayed tight and stopped water from soaking inside. That saved them thousands in drywall and insulation repairs.
Another case came from an older home in Old West End. The roof still had old felt from decades ago. It cracked under the heat, tore in wind, and rainwater leaked right into the attic. By the time they called, mold already spread in insulation. That small failure cost more than a new roof.

Storm season and roofing underlayment
Roofing underlayment is like a raincoat under your umbrella. Shingles are the umbrella. If rain blows sideways, it slips under the shingles. The underlayment, like a raincoat, keeps you dry anyway. Without it, the storm wins.
-
Winter – snow melts and freezes back, ice pushes water under shingles.
-
Spring – rains hit hard, water backs up in valleys.
-
Summer – heat warps shingles, underlayment blocks sneaky leaks.
-
Fall – leaves clog gutters, water piles up, and it tries to get under.
Every season in Ohio tests a roof. Roofing underlayment is what gives the roof backup power.
Local problems
Houses near Ottawa Hills often have tall trees dropping leaves that clog gutters. When water backs up under shingles, underlayment is the only thing stopping wood rot.
In Point Place, winds off the lake lift shingles quick. Homes with synthetic underlayment do way better than those with old felt. The difference is dry ceilings versus ruined drywall.
Stories from jobs
One call came after a storm ripped almost half the shingles off a roof in Maumee. Everyone expected the inside of the home to be soaked. But because a strong synthetic underlayment was installed, the house stayed dry. Repairs were still needed, but it wasn’t a total disaster.
Another call came from a family who thought small leaks were “just condensation.” Turns out the old underlayment had failed, letting water slip in slowly for months. By the time it was caught, rafters were soft, insulation soggy, and mold already spreading. That repair cost way more than a proper install would have.
Why roofing underlayment is worth it
Shingles alone can’t stop everything. Decking alone can’t stay dry forever. Roofing underlayment connects the whole system together. It blocks water, slows leaks, and gives homeowners time to fix storm damage before it turns big.
Opinion from local contractor
Procraft Home Products is a veteran-operated roofing contractor, and we always recommend synthetic roofing underlayment for most homes. It’s stronger, handles Ohio storms better, and lasts longer than felt. Ice and water shield is smart for roof valleys, chimneys, and around vents. Some skip it to save money, but we’ve seen that backfire too many times. Spending a little more upfront saves thousands later when storms hit.
Things homeowners should watch for
If any of these signs show up, roofing underlayment might be failing:
-
Brown stains on ceilings
-
Damp smell in attic
-
Missing shingles after wind storms
-
Gutters clogged with water backing up
-
Warped or soft wood decking
Catching these early can mean the difference between a small patch job and a full roof replacement.
Final thought
Roofing underlayment is not the part you see, but it’s the part that saves the home when storms come. It holds back water, protects wood, and keeps mold from growing in hidden places. Every roof needs it, no matter how new or strong the shingles look.
So next time roofing work comes up, don’t just ask about shingles. Ask about the roofing underlayment too. That one step can be the difference between a home staying safe or dealing with thousands in damage.
Frequently Asked Question
Q: What is the best type of roofing underlayment?
Synthetic roofing underlayment is the best choice for most homes today. It’s stronger than felt, holds up better in storms, and doesn’t tear as easy when roofers walk on it. Ice and water shield is also a must in valleys, around chimneys, and roof edges.
Q: How long does roofing underlayment last?
Good synthetic underlayment can last 20–30 years under shingles, sometimes longer if the roof is installed right. Felt usually wears out much faster, sometimes in just 10–15 years.
Q: Do all roofs need roofing underlayment?
Yes. Shingles by themselves are not enough. Without underlayment, water gets to the wood deck fast, and leaks spread through the attic and walls.
Q: Can roofing underlayment be replaced without new shingles?
Most of the time no. To replace underlayment, shingles have to come off first. That’s why it’s smart to do both together during a roof replacement.
Q: Is roofing underlayment needed under metal roofs?
Yes. Even with metal, underlayment helps stop condensation, keeps wood dry, and adds fire resistance in some cases.
Q: How do I know if my roofing underlayment is damaged?
Signs include brown water stains on ceilings, damp attic smells, and leaks showing up after storms even though shingles look fine. A roofing inspection is the best way to be sure.