Home Roofing Inspection Guide for Homeowners
Think your roof is fine because there are no visible leaks? Think again. Many roofing problems hide beneath the surface and don’t show signs until serious damage is done. Your roof is the most important part of your home, but most homeowners never check it until water stains or missing shingles appear – and by then, repairs can cost thousands more than if you caught problems early. That’s why a regular home roofing inspection is not just a good idea – it’s a must.
Whether you’re living in your forever home or just moved in, this guide will walk you through what to look for, when to call a roof inspection company, and how to avoid costly surprises.
Why Roof Inspections Matter
Your roof stands between your home and everything nature throws at it— rain, wind, snow, and heat. But over time, even the strongest roof takes a hit. A small leak or damaged shingle can turn into rotted wood, mold, or even structural damage if ignored. That’s why working with a trusted roof inspection company near you is key to staying ahead of costly problems. Regular inspections help:
- ✔ Save money – Fix small problems before they become expensive
- ✔ Extend roof life – Proper care adds 5-10+ years to your roof
- ✔ Prevent emergencies – No surprise leaks during storms
- ✔ Keep insurance valid – Some policies require inspections

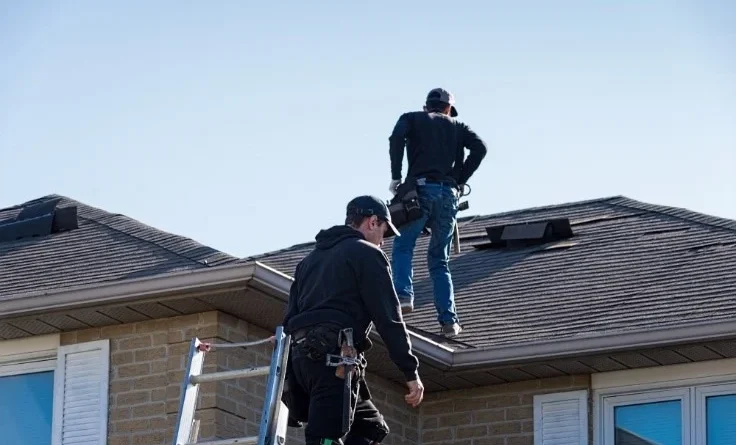
How to Inspect Your Roof (Safely!)
You don’t need to climb on your roof to spot problems. Here’s how to check from the ground:
1. Look for Visible Damage
- Missing, cracked, or curling shingles
- Dark streaks (algae or moss growth)
- Rusty or damaged flashing (metal around chimneys/vents)
2. Check Inside Your Attic
- Water stains or wet spots on rafters or insulation
- Daylight coming through cracks (means holes!)
- Musty smells (sign of hidden leaks)
3. Watch for Warning Signs
- Higher energy bills (poor roof ventilation)
- Granules in gutters (shingles wearing out)
- Sagging roof sections (serious structural issue)
When to Call a Roof Inspection Company
Some problems need a professional. Call for an inspection if:
- 🚨 You see leaks or water stains inside
- 🚨 Shingles are missing or badly damaged
- 🚨 Your roof is over 15 years old
- 🚨 After a major storm (hail, heavy wind, snow)
A roof inspection near me search will find local pros who can give a detailed report.
What’s the Roof Inspection Cost?
Many homeowners worry about the cost. Here’s the good news: Procraft Home Products offers free roof inspections. If you do pay, the roof inspection cost usually depends on the type of property and inspection method:
- Basic visual inspection: $150–$400 (most homeowners)
- Drone or infrared inspection: $300–$600 (for hard-to-see issues)
- Commercial roof inspection: $500–$2,000+ (larger buildings)
Knowing what to expect helps you avoid surprises and budget wisely.
DIY vs. Professional Roof Inspections
| DIY Inspection | Professional Inspection |
|---|---|
| Free or low cost | More thorough |
| Good for routine checks | Finds hidden damage |
| Limited to what you can see | Uses tools like moisture meters |
| Risk of missing problems | Detailed report for insurance |
A licensed roof inspection company knows what to look for and can spot damage that most people miss. Trying to save a few bucks with DIY may seem smart now, but it might cost you big later.
How Often Should You Inspect?
Experts recommend a full home roof inspection at least once a year, preferably in the spring or fall. You should also get one after a big storm or if you’re buying or selling a home.
If you own a business property, the same rules apply. A proper commercial roof inspection can save you from losing tenants, failing inspections, or dealing with unexpected insurance claims.

Don’t Wait Until Your Roof Fails
Ignoring small problems leads to:
- 💸 $5,000+ in repairs (vs. a few hundred for early fixes)
- 🏠 Mold growth (health hazard + expensive cleanup)
- 📉 Lower home value (buyers walk away from bad roofs)
Need a professional opinion? Our certified inspectors give honest assessments—no pressure, no scams. Call us today and protect your home before the next storm hits.
Final Thoughts
Skipping roof inspections may seem like no big deal—until it becomes one. Protect your home, your family, and your wallet by scheduling a regular roof inspection.
Whether you need a quick check-up or a full commercial roof inspection, ProCraft Home Products is your local, trusted name in roofing. We serve homeowners across the Toledo area and are A+-rated by the BBB.
Contact us today to schedule your free roof inspection near you and find out why our customers call us the best roof inspection company in town.