How to Blow Insulation in Your Attic
Insulating your attic is one of the most effective ways to improve your home’s energy efficiency, lower utility bills, and maintain a comfortable indoor temperature. Blown-in insulation, also known as loose-fill insulation, is a popular choice for attics due to its ability to fill gaps and cover irregular spaces. Whether you’re a homeowner looking to tackle this project yourself or considering professional help, this guide will walk you through the process of blowing insulation in your attic, including preparation, materials, equipment, and tips for success.
What Is Blown-In Insulation?
Blown-in insulation is a loose, lightweight material, typically cellulose or fiberglass, that’s blown into your attic using a specialized machine. This method allows the insulation to spread evenly across the attic, filling small gaps, corners, and hard-to-reach areas that traditional batt insulation might miss. The result is a seamless thermal barrier that prevents heat loss in winter and keeps cool air inside during summer.
Why Choose Blown-In Insulation?
- Energy Efficiency: Blown-in insulation can reduce energy bills by 15–25%, depending on your climate and existing insulation levels.
- Comprehensive Coverage: It conforms to any attic shape, ensuring no gaps or air leaks.
- Quick Installation: Professionals can complete the job in a few hours, and DIYers can finish in a weekend with the right equipment.
- Eco-Friendly Options: Cellulose insulation is often made from recycled materials, such as newspapers, making it a sustainable choice.
Types of Blown-In Insulation
Before starting, select the appropriate material for your specific needs. The two most common types are:
Cellulose Insulation
- Composition: Made from 70–85% recycled paper, treated with fire-retardant chemicals like boric acid.
- R-Value: Approximately 3.2–3.8 per inch, ideal for colder climates.
- Pros: Eco-friendly, excellent soundproofing, cost-effective ($0.50–$1.50 per square foot).
- Cons: Can settle over time, reducing R-value; may absorb moisture if not properly sealed.
Fiberglass Insulation
- Composition: Made of fine glass fibers with minimal chemical additives.
- R-Value: Approximately 2.2–2.7 per inch, slightly lower than cellulose.
- Pros: Lightweight, fire-resistant, doesn’t absorb moisture.
- Cons: Can cause skin and lung irritation during installation; slightly more expensive ($0.75–$2.00 per square foot).
The R-value measures thermal resistance; the higher the R-value, the better the insulation. Check your local building codes or the U.S. Department of Energy’s recommendations for the ideal R-value in your climate zone (typically R-38 to R-60 for attics).
Tools and Materials You’ll Need for DIY Blown-In Insulation
If you decide to tackle the project yourself, gather these tools and materials before starting:
- Insulation Blower Machine: Available for rent at home improvement stores like Home Depot or Lowe’s (rental cost: $50–$100 per day).
- Blown-In Insulation: Cellulose or fiberglass, enough to achieve the desired R-value (calculate bags based on attic square footage and R-value needs).
- Protective Gear: Safety goggles, dust mask or respirator, gloves, and long-sleeve clothing to protect against irritation (especially with fiberglass).
- Ladder: A sturdy ladder to access the attic safely.
- Measuring Tape and Ruler: To measure attic dimensions and insulation depth.
- Attic Baffles or Ventilation Chutes: To maintain airflow and prevent insulation from blocking vents.
- Utility Knife and Boards: For cutting insulation bags and creating a stable working surface in the attic.
- Flashlight or Headlamp: For visibility in dark attic spaces.
- Vapour Barrier or Sealant: To address air leaks before insulating (optional but recommended).
Calculating Insulation Needs
To determine how much insulation you need:
- Measure Your Attic: Calculate the square footage (length × width). For example, a 30’ × 40’ attic is 1,200 square feet.
- Check R-Value Requirements: Use the U.S. Department of Energy’s R-value map to find the recommended R-value for your region (e.g., R-38 for moderate climates, R-60 for colder areas).
- Calculate Bags Needed: Insulation bags list coverage per bag based on R-value. For example, a bag of cellulose insulation might cover 40 square feet at R-38. Divide your attic’s square footage by the coverage per bag to estimate the number of bags (e.g., 1,200 ÷ 40 = 30 bags).
Pro Tip: Overestimate slightly to account for settling (especially with cellulose) and ensure you achieve the desired R-value.
Step-by-Step Guide to Blowing Insulation in Your Attic
Follow these steps to blow insulation in your attic safely and effectively:
Step 1: Prepare the Attic
Proper preparation ensures safety and maximizes insulation performance.
- Inspect the Attic: Check for mold, water damage, or pest issues. If you suspect asbestos (common in homes built before 1980), hire a professional to test and remove it before proceeding.
- Seal Air Leaks: Use caulk or spray foam to seal gaps around vents, pipes, and wiring penetrations. Air leaks reduce insulation effectiveness and increase energy costs.
- Install Baffles: Place ventilation chutes at soffit vents to maintain airflow and prevent insulation from blocking vents, which can lead to moisture buildup.
- Clear Obstructions: Remove old insulation, debris, or stored items to create a clean workspace.
- Set Up a Work Platform: Lay plywood or boards across joists to create a stable surface for moving in the attic.
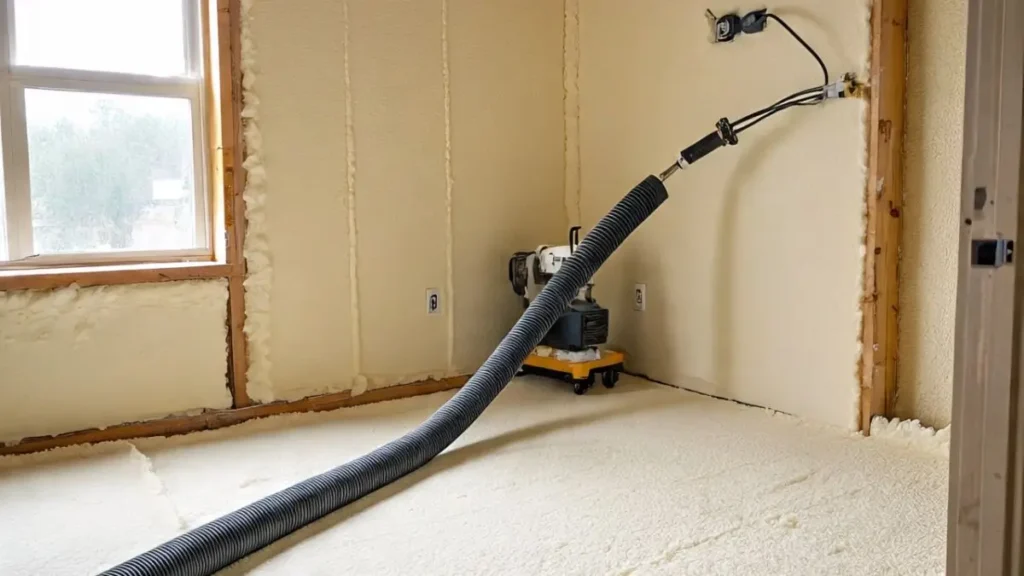
Step 2: Set Up the Insulation Blower
Rent a blower machine and set it up outside or in a well-ventilated area (like a garage) to minimize dust indoors.
- Read the Manual: Follow the manufacturer’s instructions for your specific blower model.
- Load the Machine: Break up insulation bags and feed them into the hopper. Avoid overpacking to prevent clogs.
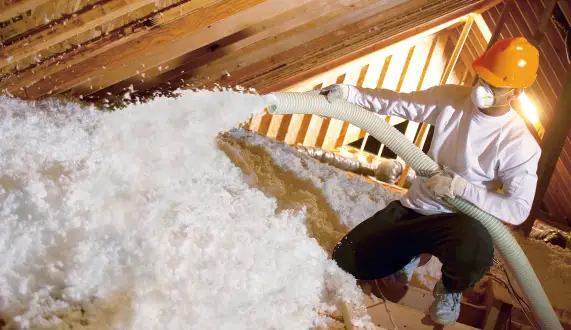
- Attach the Hose: Connect the long, flexible Hose to the blower and run it into the attic. Have a partner manage the machine while you work in the attic.
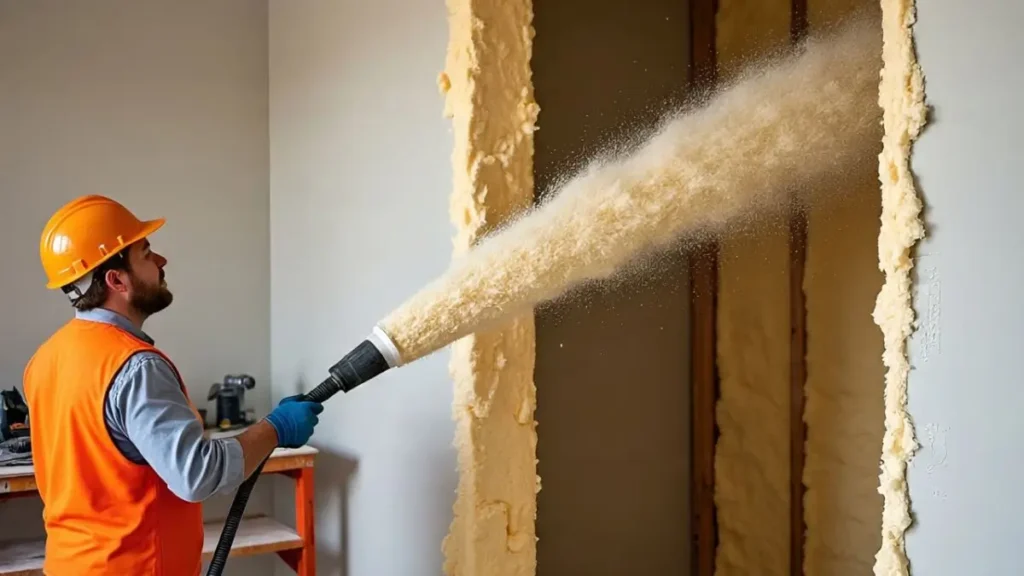
Step 3: Blow the Insulation
- Start at the Far End: Begin at the farthest corner of the attic and work toward the access point to avoid trampling the insulation.
- Hold the HoseHose Properly: Keep the HoseHose 2–3 feet above the floor and move it in a sweeping motion to distribute insulation evenly.
- Monitor Depth: Use a ruler to check insulation depth periodically to ensure you’re meeting the target R-value (e.g., 12–15 inches for R-38 with cellulose).
- Avoid Over-Blocking Vents: Ensure insulation doesn’t cover soffit vents or exhaust fans, as this can cause moisture issues or overheating.
Step 4: Clean Up and Inspect
- Check Coverage: Walk carefully across the attic (on boards) to confirm even coverage and no missed spots.
- Clean the Blower: Return the rental machine clean to avoid extra fees.
- Dispose of Waste: Recycle empty insulation bags and clean up any spilled material.
- Test Comfort: After a few days, monitor your home’s temperature and energy bills to gauge the insulation’s effectiveness.
Safety Tips for Blowing Insulation
Working with blown-in insulation requires caution to protect your health and home:
- Wear Protective Gear: Fiberglass can irritate skin, eyes, and lungs. Use a respirator, not just a dust mask, for extended exposure.
- Ensure Proper Ventilation: Open windows or use fans to reduce dust inhalation.
- Avoid Electrical Hazards: Keep insulation away from recessed lights, chimneys, or other heat sources unless they’re rated for insulation contact (IC-rated fixtures).
- Work with a Partner: Have someone assist with the blower machine and monitor safety from below.
- Check Load Capacity: Ensure your attic floor can support the added weight of insulation, especially in older homes.
Costs of Blowing Insulation in Your Attic
DIY Costs
- Insulation Material: $0.50–$2.00 per square foot (e.g., $600–$2,400 for a 1,200-square-foot attic).
- Blower Rental: $50–$100 per day.
- Additional Supplies: $100–$300 for protective gear, baffles, and sealant.
- Total: $750–$2,800, depending on attic size and material.
Professional Costs
- Labor and Materials: $1.25–$3.15 per square foot (e.g., $1,500–$3,800 for a 1,200-square-foot attic).
- Factors Affecting Cost: Attic size, accessibility, existing insulation removal, and regional labor rates.
Many homeowners find professional installation worth the cost for peace of mind, especially in complex attics or when rebates (like those from utility companies) offset expenses.
Benefits of Blown-In Attic Insulation
Investing in blown-in insulation offers long-term rewards:
- Lower Energy Bills: Save 15–25% on heating and cooling costs annually.
- Improved Comfort: Maintain consistent indoor temperatures year-round.
- Environmental Impact: Reduce energy consumption and carbon footprint, especially with eco-friendly cellulose.
- Increased Home Value: Energy-efficient homes appeal to buyers and may qualify for tax credits or rebates.
Common Mistakes to Avoid
- Skipping Air Sealing: Failing to seal leaks reduces insulation effectiveness by up to 30%.
- Overloading the Blower: This can cause clogs and uneven distribution.
- Ignoring Ventilation: Blocking vents leads to moisture buildup and mold growth.
- Underestimating R-Value: Too little insulation won’t deliver energy savings.
- Neglecting Safety: Skipping protective gear or working alone increases health and injury risks.
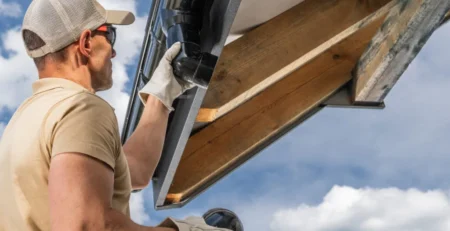
When to Call a Professional
If your attic has structural issues, limited access, or requires significant prep work (e.g., removing old insulation or addressing mold), hire a professional. They can also provide energy audits to pinpoint inefficiencies and recommend the best insulation type for your home. For a free estimate or to discuss your project, reach out to the team at Pro Craft Home Products for professional service in the Toledo, Ohio area.
Conclusion
Blowing insulation in your attic is a smart investment for comfort, energy savings, and sustainability. Whether you choose DIY or professional installation, proper preparation, the right materials, and attention to safety are key to success. By following this guide, you can achieve a well-insulated attic that keeps your home cozy and your energy bills low.
Ready to get started? Calculate your insulation needs, gather your supplies, or reach out to a trusted contractor to transform your attic into an energy-efficient powerhouse.


Leave a Reply