How to Install Gutters in 12 Steps | Pro Craft Home Products
Professional gutter installation in Toledo Ohio follows 12 steps: remove existing gutters and haul away debris, inspect fascia for rot and moisture damage, mark the high point and establish correct pitch, snap a chalk line at quarter inch drop per 10 linear feet toward each downspout, install downspout outlet locations, fabricate seamless aluminum gutter on site to the exact roofline length, cut mitered corners, install end caps and seal joints, hang the gutter using hidden hanger brackets every 24 inches, install downspout elbows and sections, secure downspouts to the wall with straps every four feet, and position downspout extensions four to six feet from the foundation. Most Toledo gutter installations complete in one day. Cost runs $8 to $14 per linear foot installed for seamless aluminum. A standard Toledo ranch with 150 linear feet of gutter runs $1,200 to $2,100 installed.
We install seamless gutters throughout Toledo and Lucas County. Call 419.475.9600 for a free estimate.
Why Toledo Gutter Installation Is Different From Other Ohio Markets
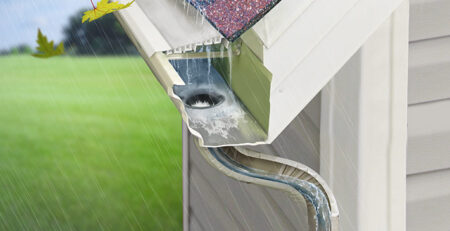
Toledo receives 34 inches of annual precipitation plus 40 to 60 inches of lake-effect snow from Lake Erie. That combination puts more total water through a residential gutter system than most Ohio markets south of I-70 see in a full year. The standard 5-inch K-style gutters installed on most Toledo homes built before 2000 were never sized for this volume. During a Lake Erie rain event, a 5-inch gutter on a steep-pitched Toledo bungalow roof cannot accept water fast enough and overflows the front edge.
Six-inch K-style seamless gutters are the correct specification for Toledo homes. A 6-inch gutter handles approximately 40 percent more water volume than a 5-inch gutter. The difference is not visible from the street but the performance difference during a Toledo storm event is significant. Toledo also sits on Hoytville silty clay loam soil that expands when saturated by uncontrolled roof runoff. A gutter that overflows during heavy rain is creating foundation hydrostatic pressure on every event. Correct gutter sizing in Toledo is not an upgrade. It is the baseline specification for this market.
Step 1 — Remove Existing Gutters and Dispose of Debris
Old gutter removal is the first step and the one most Toledo homeowners underestimate. Sectional aluminum gutters installed before 2000 on Toledo homes are typically spike-and-ferrule systems where a nail drives through the gutter face into the fascia. Every spike must be pulled cleanly without splitting the fascia board behind it. Gutters that have been frozen against the fascia through multiple Toledo winters sometimes bond to the wood and require careful prying to remove without damaging the fascia surface.
All removed gutter material, end caps, downspout sections, and hardware are loaded directly into a waste container during removal. A professional crew does not pile old gutters in the driveway for cleanup later. The roofline should be clean and accessible before any fascia inspection begins.
Step 2 — Inspect and Repair Fascia Before Any New Material Goes Up
This is the step most Toledo gutter contractors skip and the one that causes the most early failures on new gutter installations. Fascia boards on Toledo homes that have been holding failing gutters for years absorb moisture behind the bracket points. When a new gutter is anchored into rotted fascia, the hidden hanger bracket pulls through the soft wood within one to two Toledo winters and the gutter sags and separates from the roofline.
We inspect every linear foot of fascia before any new material is ordered or installed. Soft spots are pressed and photographed. Any section that shows rot, moisture staining, or inadequate structural integrity is replaced before new gutters are hung. Replacing five feet of rotted fascia during the installation adds a small cost and prevents the new gutter from failing at the same location within three years. Every Toledo gutter installation we complete starts with a documented fascia assessment.
Step 3 — Establish the High Point and Mark the Pitch Line
Correct pitch is what separates a gutter that drains completely after every rain event from one that holds standing water between events. A gutter that holds standing water in Toledo freezes solid from December through February and adds ice weight to the hanger system every winter. Standing water also breeds mosquitoes through Toledo’s warm spring and summer months.
The correct pitch for Toledo gutter installation is a quarter inch of drop for every 10 linear feet of run toward the downspout. On a standard 40-foot run, the high end sits one inch above the low end at the downspout outlet. We establish the high point first, snap a chalk line at the correct pitch angle, and confirm the line before any brackets are installed. A run that is longer than 40 feet needs two downspout outlets, one at each end of the run, with the high point in the middle. A single downspout at one end of a 50-foot Toledo gutter run creates pooling at the far end regardless of how correctly the rest of the installation is executed.
Step 4 — Mark Downspout Outlet Locations
Downspout placement on a Toledo home is not arbitrary. Every downspout outlet location determines where roof runoff discharges to ground level. On Toledo lots with Hoytville silty clay loam soil, every discharge point needs to be positioned where water can move away from the foundation rather than pooling against it.
We mark downspout locations before fabricating the gutter to confirm they align with the exterior wall surfaces where straps can anchor the downspout sections, and with the ground level locations where extensions or underground drainage can carry water the required four to six feet from the foundation. A downspout positioned in the corner of an L-shaped Toledo home where two wall planes meet cannot be properly strapped or drained without additional planning before the gutter is fabricated. Outlet locations are marked and confirmed before any material is cut.

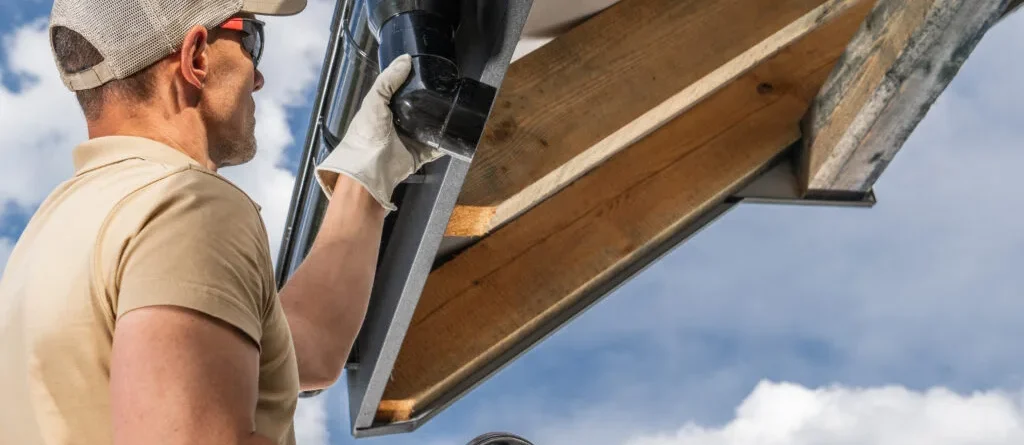
Step 5 — Fabricate Seamless Gutter On Site
This is what makes seamless gutters fundamentally different from sectional gutters on Toledo homes. A seamless gutter is fabricated on site by running aluminum coil stock through a gutter machine that continuously forms the K-style or half-round profile to the exact length of each roofline run. The result is a single continuous piece of gutter with no seam joints in the middle of the run. The only sealed connections on a seamless system are at corners, end caps, and downspout outlets.
On a standard Toledo ranch with a 40-foot front gutter run, a sectional system has four to five joints across that run, each sealed with butyl sealant that Toledo’s freeze-thaw cycling degrades over time. A seamless system has zero joints across the same run. We fabricate every seamless gutter in Toledo on site to the exact dimension of the roofline measured directly at the fascia. No standard lengths cut short and shimmed. No gaps at the end caps from an incorrect cut. Every run fabricated to the exact inch.
Step 6 — Cut Mitered Corners and Install End Caps
Every corner where two gutter runs meet on a Toledo home requires a mitered joint cut at 45 degrees and sealed with polyurethane sealant rated for Ohio’s temperature range. A corner joint that is not properly mitered leaves a gap that concentrates water flow at the joint edge and produces a leak within one to two Toledo winters.
End caps are installed at the terminal end of every gutter run, sealed on both the interior and exterior surfaces with polyurethane sealant. The sealant bead is tooled into the joint rather than applied as a surface bead. A surface-applied sealant on a Toledo gutter end cap cracks within three to five freeze-thaw cycles. A tooled joint that adheres to both mating surfaces moves with the metal as temperatures change from below zero in January to above 90 in July and maintains the seal through Toledo’s full temperature range.
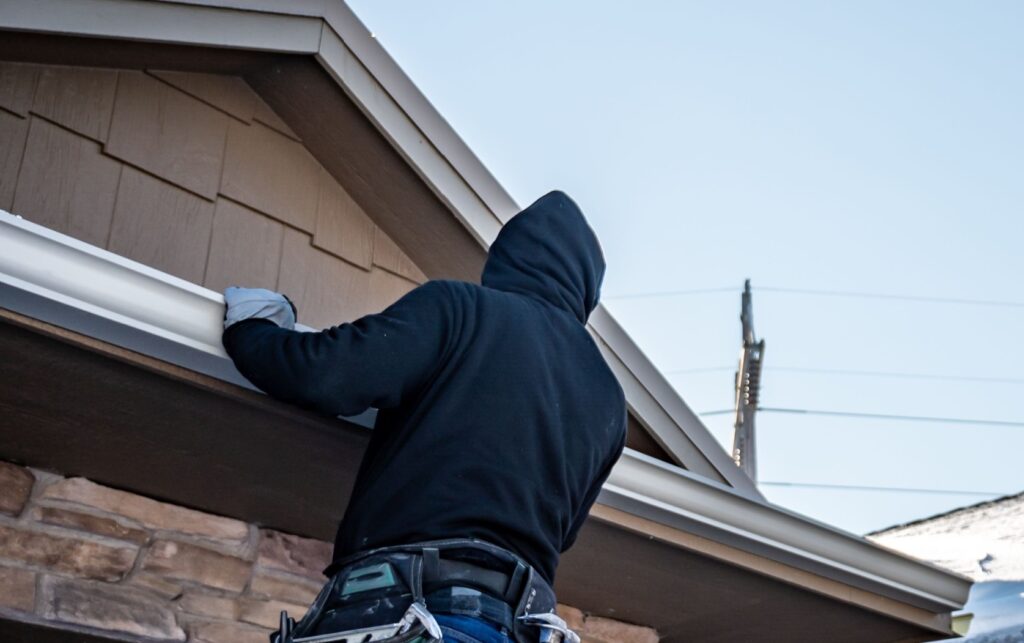
Step 7 — Hang the Gutter Using Hidden Hanger Brackets
Hidden hanger brackets are the correct fastening system for seamless gutter installation in Toledo Ohio. A hidden hanger is a one-piece bracket that passes through the gutter interior and screws directly into the fascia through the gutter back. The screw is driven into the fascia at a slight upward angle to engage the rafter tail or fascia framing behind the finished fascia board. No nail penetrates the gutter face. No spike works loose from the fascia over freeze-thaw cycling.
Hidden hangers are installed every 24 inches on a Toledo gutter installation. Every 24 inches is the correct spacing for Toledo’s ice load. Hangers spaced at 36 inches or more deflect under ice accumulation in Toledo winters and allow the gutter profile to sag between support points. A sagging gutter pools water at the midpoint of the sag, freezes in Toledo winters, adds weight, and accelerates the failure that the reduced hanger spacing should have prevented. We install hidden hangers at 24-inch spacing on every Toledo gutter installation regardless of hanger cost.
Step 8 — Install Downspout Outlets and First Elbows
The downspout outlet is the fitting that connects the bottom of the gutter to the vertical downspout run. Every outlet is sealed to the gutter surface with polyurethane sealant on the interior joint before the outlet is pressed into the cut hole in the gutter bottom. A sealed outlet joint prevents water from running along the gutter bottom and dripping between the outlet and the gutter surface on every rain event.
The first elbow at the top of the downspout run angles the downspout away from the fascia surface and toward the wall. On Toledo homes with 5-inch-deep fascia boards, a standard A-style elbow creates the correct offset. On Toledo colonial and two-story homes with wider overhang and fascia configurations, a B-style elbow or a combination is required. We measure the fascia depth and overhang dimension before specifying elbow style on every Toledo downspout run.
Step 9 — Connect Downspout Sections and Secure to Wall
Downspout sections on a Toledo home are typically 10-foot aluminum pieces connected at crimped joints. Each joint requires a hex-head screw on two opposing sides to secure the connection against wind separation. Toledo’s Lake Erie wind events produce sustained gusts that can pull unsecured downspout joints apart on exposed northwest-facing wall surfaces.
Downspout straps anchor each downspout section to the wall surface at maximum four-foot intervals. On Toledo brick homes common in Old West End, Library Village, and Ottawa Hills, downspout straps require concrete anchors rather than wood screws. We specify the correct anchor type for the wall material on every Toledo home before any straps are installed.
Step 10 — Position Downspout Extensions Away From the Foundation
Downspout extensions are the most important component of a Toledo gutter system for foundation protection. Toledo’s Hoytville silty clay loam soil is among the most expansive foundation soils in Ohio. When this soil becomes saturated by water discharging directly against the foundation from a downspout, it expands and creates hydrostatic pressure against the basement wall. That pressure is what produces basement wall cracks that cost $10,000 to $30,000 to repair.
Downspout extensions on Toledo homes must carry water at least four to six feet from the foundation wall. On Toledo lots where the grade slopes toward the house, four to six feet is not enough to prevent water from running back to the foundation. On those lots, underground downspout drains that run to a pop-up emitter further from the structure are the correct solution. We assess grade and soil drainage at every downspout location during a Toledo gutter estimate and recommend the correct extension or underground drainage approach for each specific property.
Step 11 — Verify Pitch and Flow Test Every Run
After all gutter sections are hung, every run is verified for pitch before the crew leaves. We pour water into the gutter at the high end and confirm it drains completely toward the downspout outlet without pooling at any point along the run. Any section that holds water is adjusted before the job is considered complete.
A flow test after installation is the only way to confirm that the pitch established at the chalk line stage was maintained through fabrication, corner installation, and bracket hanging. A run that was pitched correctly at the chalk line can end up flat or reverse-pitched if a bracket was installed slightly off the line or if a corner fitting added unexpected height. The flow test catches these issues before the Toledo homeowner calls in the spring about a gutter that does not drain after every rain event.
Step 12 — Clean Up and Final Walkthrough
Every Pro Craft gutter installation in Toledo ends with a complete property cleanup and a homeowner walkthrough before final payment. All gutter fabrication scraps, old gutter material, downspout packaging, and hardware are removed from the property. Gutters are cleared of any aluminum shavings or debris from the fabrication process. The ground below the roofline is walked for loose screws and hardware.
The homeowner walkthrough covers the completed installation from the ground, the correct downspout extension positioning relative to the foundation, and the maintenance schedule Toledo homeowners should follow to protect the new gutter investment. Toledo homeowners with silver maple coverage need gutters cleaned in June after samara seed drop, in October before heavy leaf fall, and in December before the first hard freeze. With Pro Craft gutter guards installed, that three-times-per-year cleaning cycle is eliminated.
How Much Does Gutter Installation Cost in Toledo, Ohio?
Seamless gutter installation in Toledo Ohio runs $8 to $14 per linear foot installed including downspouts, hidden hangers, end caps, and basic downspout extensions.
Standard Toledo ranch, 150 linear feet: $1,200 to $2,100 installed for 5-inch seamless aluminum. 6-inch gutters add $1 to $2 per linear foot.
Fascia repair during installation: $4 to $8 per linear foot for sections requiring replacement. Documented with photos and approved before proceeding.
Gutter guards: $8 to $22 per linear foot for stainless steel micromesh. Most Toledo homeowners recover the gutter guard cost within three to five years in eliminated cleaning costs and prevented ice dam damage.
Downspout extensions and underground drainage: $50 to $300 per downspout depending on extension length and whether underground drainage is required for the Toledo lot’s grade condition.
We provide free written estimates for every Toledo gutter project. Call 419.475.9600 or request a free estimate online.
When to Replace vs When to Repair Toledo Gutters
Repair is the right call when: A single section has a leaking seam joint. One bracket has pulled from the fascia and the wood behind it is sound. A downspout has separated at a joint and needs a new screw and sealant. Minor repairs on Toledo gutters run $75 to $250 for most isolated scopes.
Replacement is the right call when: Multiple seam joints are leaking across the full run. The gutter profile is visibly sagging between hanger points on multiple sections. The fascia behind the brackets shows significant rot on more than one run. The existing gutters are 5-inch on a Toledo home that needs 6-inch for adequate drainage. The system is more than 20 years old and has been repaired multiple times.
A Toledo gutter system that has been resealed repeatedly at the same joints and is still leaking is a system that needs replacement, not another round of sealant. Pro Craft provides a direct assessment after every free inspection. We tell you whether repair is the practical answer or whether you are spending money on a system that will require the same conversation in two years.
Pro Craft Seamless Gutter Installation Toledo Ohio
We install seamless gutters throughout Toledo and Lucas County with 6-inch K-style aluminum as the standard specification for Toledo’s precipitation volume. Every run fabricated on site to the exact roofline dimension. Hidden hanger brackets at 24-inch spacing. Correct pitch verified by flow test before we leave. Fascia assessed and repaired before new gutters are hung.
We also install gutter guards in Toledo and pair gutter installation with roof replacement, vinyl siding, and blown-in insulation in one project scope. BBB A+ since 2005. Own crews. No subcontractors. Written estimates. Written warranties. Phones answered 24 hours a day at 419.475.9600. Request a free gutter estimate online.
Frequently Asked Questions
How much does seamless gutter installation cost in Toledo, Ohio?
Seamless gutter installation in Toledo runs $8 to $14 per linear foot installed. A standard Toledo ranch with 150 linear feet runs $1,200 to $2,100. 6-inch gutters add $1 to $2 per linear foot. Fascia repairs are documented with photos and approved before proceeding. Free written estimate before any commitment. Call 419.475.9600.
What size gutters does a Toledo Ohio home need?
6-inch K-style seamless gutters are the correct specification for Toledo homes. Toledo receives 34 inches of annual precipitation plus lake-effect events that overwhelm standard 5-inch gutters on steep-pitched rooflines. 6-inch gutters handle 40 percent more water volume than 5-inch. Free written estimate from us. Call 419.475.9600.
How often should Toledo homeowners clean their gutters?
Three times per year. June to remove silver maple samaras. October before heavy leaf fall. December before the first hard freeze to prevent ice formation that pulls brackets from the fascia. With stainless steel micromesh gutter guards installed, this three-times-per-year cycle is eliminated. Call 419.475.9600.
Why do Toledo gutters sag and pull away from the house?
Spike-and-ferrule hangers on pre-2000 Toledo gutters work loose from freeze-thaw cycling over 20 to 30 winters. We replace failing systems with hidden hanger seamless gutters screwed directly into the fascia at 24-inch spacing. Hidden hangers handle Toledo’s ice load without working loose. Call 419.475.9600.
Why does water pool in my basement after rain in Toledo?
Downspouts discharging within two feet of the foundation saturate Toledo’s Hoytville silty clay loam soil and create hydrostatic pressure against basement walls. Downspout extensions carrying water four to six feet from the foundation reduce this pressure significantly. On Toledo lots where grade slopes toward the house, underground drainage to a pop-up emitter is the correct solution. Call 419.475.9600.
Does Pro Craft install seamless gutters in Toledo?
Yes. We install seamless gutters throughout Toledo and Lucas County with 6-inch K-style aluminum, hidden hangers at 24-inch spacing, on-site fabrication to exact roofline dimensions, and flow testing before we leave. Free written estimate. Call 419.475.9600 or request online.


Leave a Reply