
How to Install Vinyl Siding? Complete Guide
To install vinyl siding, begin by preparing a clean, level wall surface with proper weatherproofing and flashing in place. Start at the bottom of the wall, locking the first panel into the starter strip, and work your way upward, making sure each panel snaps tightly into the one below it.
Always leave room for expansion by not nailing panels too tightly. Use corner posts and J-channels for a clean edge finish around doors, windows, and soffits. Correct installation prevents water intrusion, reduces energy loss, and gives your home a long-lasting exterior finish. Let’s dive in and get your home looking sharp.
Why Install Vinyl Siding on Your Home?
Vinyl siding is durable, affordable, and low-maintenance, perfect for Toledo’s harsh weather. It resists moisture, doesn’t fade in summer heat, and can cut energy bills by up to 15%, according to the U.S. Department of Energy. The 2023 Cost vs. Value Report shows vinyl siding projects recover about 80% of their cost at resale, boosting your home’s value and curb appeal.
What Tools and Materials Are Required?
To start vinyl siding installation, you’ll need:
- Vinyl siding panels, sized for your walls
- Starter strips, J-channels, and corner posts
- Tin snips and a utility knife
- Measuring tape, chalk line, and level
- Hammer and siding nailer
- Safety glasses, gloves, and a sturdy ladder
- House wrap and weather-resistant caulk
- Optional: insulation foam board for extra efficiency
Select high-quality siding, like CertainTeed or Mastic, built for Toledo’s wind and cold. For guidance, a trusted vinyl siding contractor can recommend the best options.
How to Install Vinyl Siding: Step-by-Step

Step 1: Measure Your Walls Accurately
Measure each wall’s height and width at three points, using the smallest numbers. Multiply height by width for square footage, subtract windows and doors, and add 10% for waste. Precise measurements prevent shortages or uneven panels. If unsure, professional vinyl siding installation services in Toledo can help with exact calculations.
Step 2: Prepare the Exterior Surface
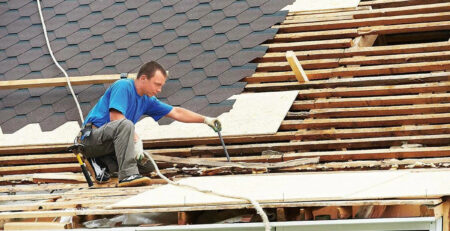
Remove old siding, lights, or shutters. Clean walls to clear dirt or mildew, common in Toledo’s humid summers. Fix any rot or damage. Install house wrap to block moisture, a must for Toledo’s rainy seasons. This creates a smooth, protected base for your siding.
Step 3: Install Starter Strips and Trim
Mark a level line 2-3 inches above the foundation with a chalk line. Nail starter strips along this line, keeping them even. Add J-channels around windows and doors, plus corner posts at edges. Nail loosely to allow vinyl to expand and contract with Toledo’s hot summers and cold winters.
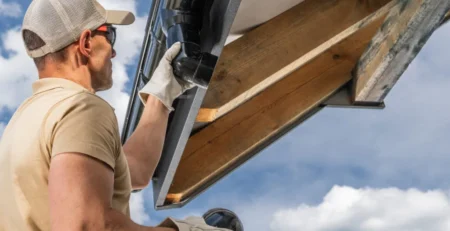
Step 4: Hang the Siding Panels
Lock the first panel into the starter strip. Nail every 16 inches, leaving a 1/32-inch gap under nail heads for movement. Overlap panels by 1 inch, facing overlaps away from visible areas for a clean look. Work upward, checking the level of each row. Choose panels rated for high winds (ASTM D5206) to withstand Toledo storms.
Step 5: Fit Around Windows and Doors
Cut panels with tin snips to fit around openings. Frame windows and doors with J-channels, sealing edges with caulk to block Toledo’s rain and snow. Careful cuts ensure a tight, professional finish.
Step 6: Add Soffit and Fascia
Install perforated soffit panels under eaves for ventilation, preventing ice dams in Toledo winters. Add fascia covers over roof edges for a sleek look. Secure loosely to allow movement, ensuring durability.
Step 7: Inspect and Clean
Check all panels are secure and level. Test for loose sections by tugging gently. Clean siding with mild soap and water to remove dust, leaving your home crisp and ready for Toledo’s weather.
What Mistakes Should You Avoid?
- Nailing too tightly, which warps panels in summer heat.
- Skipping house wrap, risking moisture damage in Toledo’s climate.
- Measuring incorrectly, causing uneven or short panels.
- Using low-grade siding, which fades or cracks quickly.
Avoid these by following the manufacturer’s guidelines. For tricky projects, siding contractors in Toledo, Ohio, ensure a perfect result.
Should You DIY or Hire a Siding Contractor?

DIY vinyl siding replacement saves money but demands time and skill. Mistakes like improper nailing can lead to leaks or damage, costing more to fix. The Vinyl Siding Institute stresses professional installation for optimal durability. In Toledo, siding contractors handle local challenges like wind and snow. Pro Craft Home Products delivers seamless installations, with customers saying, “Their team made our home look amazing in just a week!”
When Is the Best Time to Install Vinyl Siding in Toledo?
Spring or fall is optimal for Toledo siding installation. Mild weather ensures panels fit properly and sealants bond well. Winter installations risk brittle vinyl, while summer heat can cause over-expansion. Plan for spring or fall to avoid delays and ensure quality.
How Do You Maintain Vinyl Siding?
Wash vinyl siding annually with mild soap and water to remove Toledo’s common mildew and dirt. Check for cracks or loose panels after storms. Avoid harsh cleaners like bleach, which can dull the finish. Keep plants trimmed to prevent mold growth. Regular care keeps your vinyl siding in Toledo looking fresh for decades.
Are There Financing Options for Vinyl Siding?
Yes, many vinyl siding contractors offer payment plans to make projects affordable. Toledo homeowners may also qualify for energy efficiency rebates through local utilities. Ask your contractor about financing to spread costs over time, keeping your budget intact.
Frequently Asked Questions About Vinyl Siding Installation
How Long Does It Take to Install Vinyl Siding?
For a 2,000-square-foot home, professionals complete vinyl siding installation in 1-2 weeks, including prep and cleanup. DIY projects may take 2-4 weeks, depending on your skill level and available time.
Can You Install Vinyl Siding Yourself?
Yes, with the right tools and careful planning, DIY installing vinyl siding is doable. But Toledo’s weather demands precision to prevent leaks or wind damage, so professionals are often a safer bet for complex homes.
What Tools Do You Need for Vinyl Siding Installation?
You’ll need tin snips, a siding nailer, a level, a chalk line, a utility knife, and safety gear. For taller homes, rent scaffolding to work safely and efficiently.
How Do You Choose a Reliable Siding Contractor in Toledo?
Look for contractors with Toledo experience, strong reviews on Google or Yelp, and certifications from brands like CertainTeed or Owens Corning. Pro Craft Home Products is a trusted name for vinyl siding installation services in Toledo, known for quality and reliability.
Make Your Toledo Home Shine with Vinyl Siding
Installing vinyl siding transforms your home’s look, boosts energy efficiency, and protects against Toledo’s tough weather. Whether you choose DIY or hire expert siding contractors in Toledo, Ohio, quality materials and careful installation are key. For a worry-free, professional job, contact Pro Craft Home Products at 419.475.9600 for a free quote. Start your siding project today and give your home the upgrade it deserves!


Leave a Reply